Showing posts with label House Projects. Show all posts

Tuesday, August 21, 2012

Bathroom Spruce-up: Sometimes Things Don't Work Out

Untitled 

So. . . Here is the story of my bathroom fail. Inspired by all of the amazing stenciled walls I have being seen around the internet I decided to FINALLY spruce our bathroom up and thought this would be a great, practical, and affordable way of doing it.
Okay, Hold on. . .let me back up. I have been at a loss on what to do with our bathroom since the day we bought our house. We have a one bathroom house but the room is large and strangely shaped. It is extremely hard to take pictures of the room as it is very long and narrow to begin with and then gets bigger towards
the back. 
 Untitled 
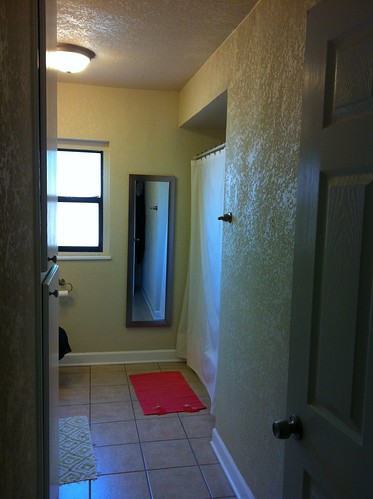
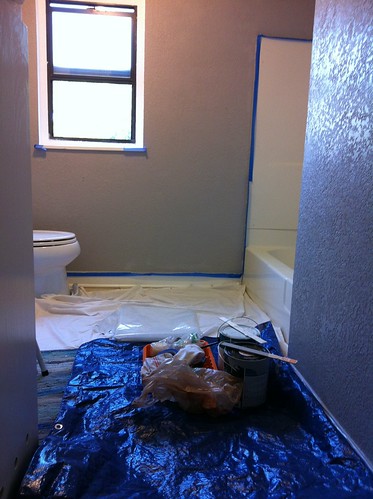
Here is a pre-spruce-up shot. Please forgive the bad lighting. 

For some reason this room froze me with indecision. I guess I was use to living in places with either so little room that beyond towels and a shower curtain styling wasn't an option or they already had a strong focal point of color theme (i.e. the pink tile in our C. Springs duplex[still my favorite bathroom of all time]). After two years of staling I hatched my stencil plan. I decided gray walls with a white ceiling and white stenciling would look great with bright towels and a bright rug! And so I began. Last Friday I spent the day painting the ceiling and walls and things went pretty well.

Untitled 
Here is the gray walls waiting for stenciling. 

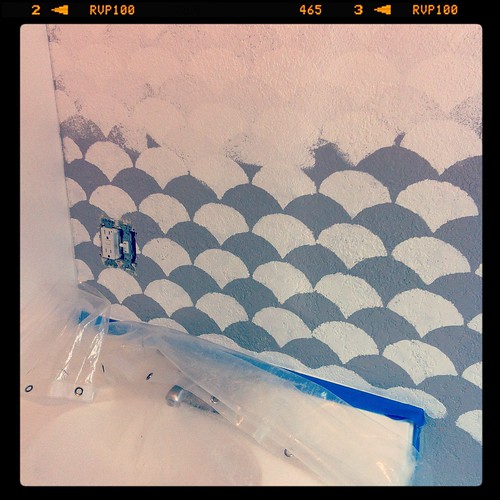
My plan was to take Jerod to work Saturday morning and begin the stenciling. I hoped to get half the room done that day before we went to a friends cook out late that afternoon. Five or so hours later about 1/8th of the room was done and not looking to good at that. We have freshly textured walls which I originally thought might be problematic for stenciling but I read/watched about a million and a half tutorials on stencils and textured walls and thought "I'm handy, I can make this work". I tried techniques using a small foam roller, a paint brush, and dabbing with a sponge. There was a lot of bleeding around the edges with all of these. I used adhesive, I used tape, I used my hands, it wasn't looking good.

Untitled 
 It looks better here than it really looked. I was still a hopeful though.

At this point I thought I was just frustrated and with a little touch up and sleep things would get better. The next morning I finished the area around our cabinet and sink and put the light fixture and mirror back up to see how I would feel about it when all was said and done, unfortunately, it just wasn't working. Jerod agreed. Jerod it very easy going about two things, my decor choices and food, if he dislikes either it must be really bad. And thus Sunday went from stenciling to painting the whole bathroom white.

Untitled 
And the cover-up begins.

It was so disappointing to paint over all of this work. But sometimes things just don't work out. The best laid plans. . .I guess. I was not this calm on Sunday.

I am holding off to show you all the white bathrooms as I have new plans that I think will work out. These plans do not involve any additional painting!!!! Expect some glamor shots soon.
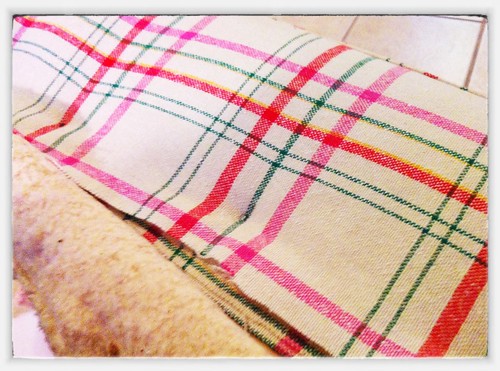
I would like to say that I still think this would look great but. . .it just didn't work out for me. I bought our stencil through Cutting Edge Stencils and they got my stencil to me in a super timely fashion and it was a good quality. I just wasn't able to make it work with our walls and our space. I am going to hold on to it and hope that the perfect, non-textured stencil spot opens up in my life.

*It needs to be noted that I was not payed or perked for this post. My promotion or mentioning of these products or vendors is solely because I think they are cool.

Tuesday, May 15, 2012

Planting . . .FINALLY

Ages ago . . .meaning last summer. . .Jerod and I extended and reframed a flower bed running along the front of our house (check out what it looked like before we worked on it here). Unfortunately, by the time we finished building it we were well into the hottest, driest summer since the Dust Bowl so we decided to wait to do any planting until this year AND I must say I am super excited about it and think it really jazzes up the front of the house. . . here are some pictures! I can't wait to see what it looks like after it fills in a bit.

Untitled
This is our little house before the planting. The mums were there when we moved in and are lovely in the fall but may ultimately get transplanted elsewhere. I will have to see how they are looking as the rest of our plants grow some. It was hard to get up the nerve to remove the one thing growing.

Untitled
 A corner shot of the flower bed. Yes . . . I know we need to weed-eat.

Untitled
All my happy little plants ready for planting:)

Untitled
Everything planted and mulched! Doesn't it look great? . . .or maybe it's just me?

Untitled
Again, I think it is a major improvement to have some living things in front of our house.
Oh. . . you can also see the attachment for the soaker hoses Jerod put in. This will make watering and upkeep sooooooooooooo much easier.
Now I am going to give you a run down on what we planted starting with the perennials:

Untitled
1: Pampas Grass- We both like ornamental grasses and it should give us some much need height and look
good for the whole growing season.


Untitled
2: Russian Sage- This is supposed to fill out nicely plus it smells delicious AND it helps in attracting butterflies. . .which seemed to be true as I was surrounded by them while planting.

Untitled
3: Tickseed- It's pretty it's yellow what more do I need to say!?!?!?
Now for the Annuals:

Untitled
4: Celosia- Jerod saw these and loved them (and I have to agree they are pretty cute) so we thought we would fill in with them (at least this year) and add a pop of color to the bed.

Untitled
5: Sweet Potato Vine- This is very popular in Oklahoma. It loves the heat, covers big areas and Jerod and I both think it is good looking so. . . we bought the green and purple varieties and staggered the planting. . .my thinking is it will overlap as is fills out and create a cool two-tone ground cover.
Don't worry I will take pictures as the summer progresses.

So what is everyone else planting? Do you love bedding plants as flowers as much as I do? I hope everyone is having a happy late Spring.

Friday, February 17, 2012

The Ottoman Empire

During the first couple of weeks we owned our house (early September 2010) I bought a torn up, green leather ottoman at a garage sale for $5. It was a great size, shape and price and had cute brass feet. . . all in all it had a lot of potential but was in no shape to be out for people to see it! Since its purchase the poor thing has sat, or more truthfully, been shoved under the table in our laundry/craft room until last week. But let's start at the begining. . .

Here it is in it's original state. . .torn up but waiting to be cute.


I began by removing all of the leather and setting it aside for pattern pieces. Removing the original leathe was probably the most time consuming part of the whole project.


Once the leather was removed I suplemented the original batting (which was in pretty good shape) with a little more just to even things out and give it a little more cushion.
Oh-I will also say at this point, I decided to eleminate the piping around the top and bottom of the ottoman and only keep some along the center seam. I tried it a couple of ways but decided that the piping was a bit fussy when mixed with the plaid fabric I was using to recover it.
One more note. . . This is the same fabric I used on our dining room chairs. I think this ties everything together nicely PLUS this fabric was donated to me from my lovely friend Amy. Making this a super cheap fix up. All told I think I spent under $10 on the whole project, how is that for frugal?


Okay. . . back to the upholstery. After I added the batting, I sewed the top and side pieces together and slipped it over the top half. Once I made sure everything was in it's place and fitting snug I tacked the edge down with upholstery tacks making sure everything was pulled evenly and securely.


Next I attached the center piping and lower fabric, covering the raw edges of the top half and piping. I attached all of this with my trusty staple gun.


With all of the visible parts being finished and pretty I stapled the remaining raw edge to the underside of the ottomen and called it done. . .well almost. . .


In it's original incarnation the ottoman had cute brass brads finishing the fabric around the legs I went ahead and bought new brads hammered them in and watched them shine!

The cats, as always, were a huge help every step of the way.

Here it is in the living room! Don't you want to kick your feet up and cuddle with a cat?